Set Up Kitty Terminal and Fastfetch on Linux
A modern terminal can make your Linux workflow faster, prettier, and more informative. After setting up Fish shell and Starship prompt, the next step is configuring Kitty terminal and Fastfetch to give you a sleek and efficient setup.
This guide works on Debian/Ubuntu-based distributions, but commands can be adapted for other distros.
1️⃣ Install Kitty Terminal
Kitty is a fast, GPU-powered terminal emulator that supports ligatures, images, and true color.
Step 1: Install dependencies
sudo apt update
sudo apt install kitty -y
Step 2: Add Kitty to PATH
Add this to your shell config (~/.config/fish/config.fish or .bashrc/.zshrc):
set PATH $PATH $HOME/.local/kitty.app/binStep 3: Launch Kitty
kittyYou now have a fast, modern terminal ready for customization.
2️⃣ Install Fastfetch
Fastfetch is a fast, lightweight system info tool — similar to neofetch but optimized for speed.
Step 1: Install build tools
sudo apt install git build-essential cmake libx11-dev libgl1-mesa-dev libfontconfig1-dev -yStep 2: Clone and build Fastfetch
git clone https://github.com/LinusDierheimer/fastfetch.git
cd fastfetch
mkdir build && cd build
cmake ..
make
sudo make install
Step 3: Run Fastfetch
fastfetchYou’ll see a clean system info display in your terminal, showing OS, kernel, uptime, packages, shell, CPU, GPU, and more.
Integrate Fastfetch with Kitty and Starship
- Open your shell config (~/.config/fish/config.fish or .zshrc) and add:
# Display system info with Fastfetch on terminal start
fastfetch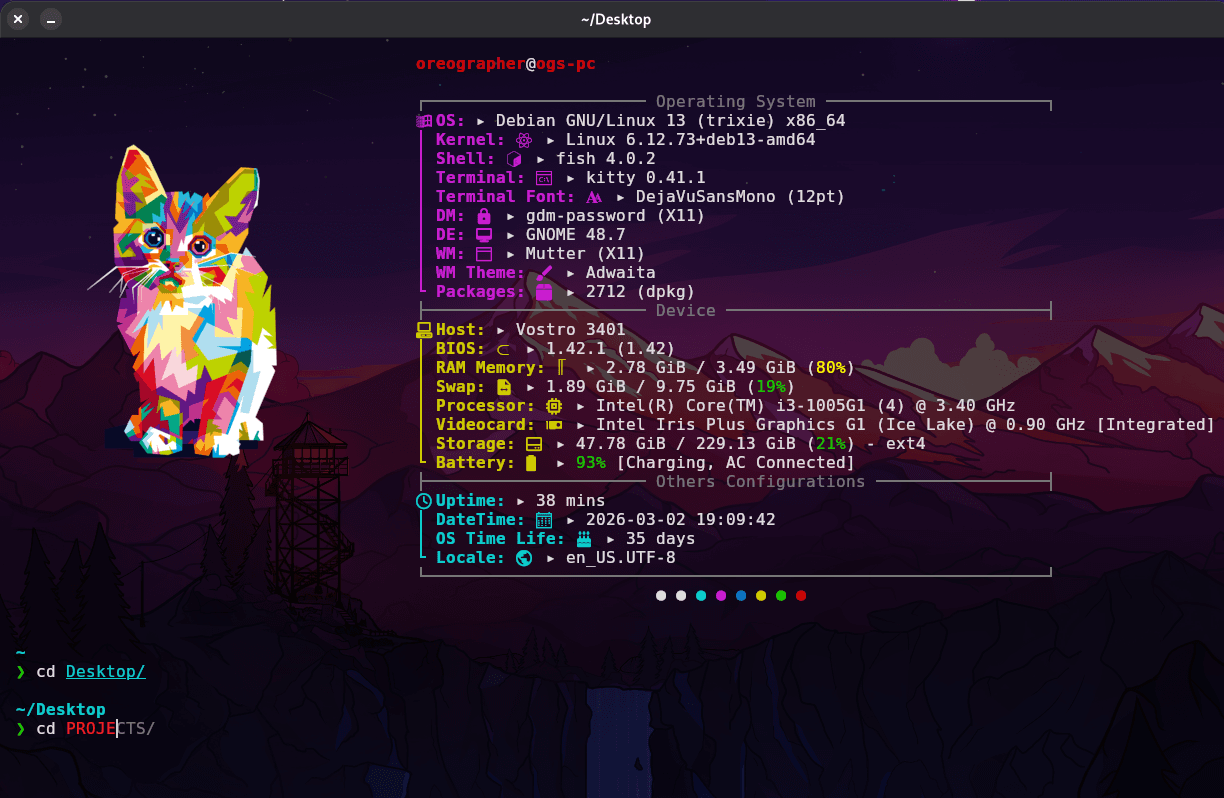
Now you are ready to use your modern terminal.